|
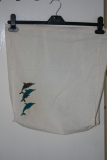
Just before Alex was born, when I was on maternity leave awaiting him, I did some fabric painting. I decorated some bought cotton bags to use as shopping bags instead of the noisy plastic ones which could wake a sleeping baby and aren't as easily mendable as a cloth one which can be patched. Alex came before I did all the ones I wanted to do though. The first few have been in use for several months. This is the Dolphins one. (I appear to have photographed the back first). |
|
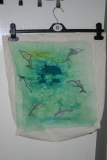
And the front side of the dolphins one. This was done with a variety of colours of green and blue, diluted slightly, then wetted further. Salt was then sprinkled on top (the wet and the salt give the mottled effect) and dolphin cut outs in black card placed on top and it was allowed to dry. Once dry the card had leaked some of its ink, and the outlines were then gone over in a raised fabric gel pen. The centre dolphins were stencilled on wetly to get the swimmy look. |
|
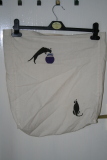
Simple cat stencils (one sided bag). My method for using stencils with fabric paint is to draw around the outline with a soft pencil, take the stencil away and then paint the outline. This avoids bleed under the stencil which can occur with fabric, especially if your brush has been washed. |
|
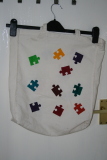
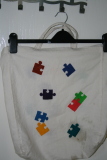
Jigsaw stencil (side 1) |
|
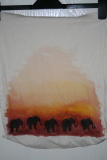
Jigsaw stencil (side 2) |
|
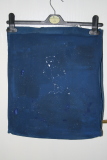
The elephants one (one sided bag). This was done with a stripe of various shades of red/orange/yellow and then sponged over with water to spread the colour. Once dry, the elephant silhouettes were stencilled in black over the top. I'm quite pleased with the effect, but I'd like to have tried to find different sizes or poses of elephant to stencil, in hindsight. |
|
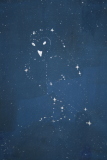
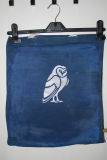
Just recently I started again, having some friends come over to help with Alex-care. I found I wanted a few more anyway. This one... well, an idea I had had didn't work at all so I painted over it in navy and then had to think of something to do with the bag. I flicked silver paint at the bag and then did a constellation based on an owl stencil. I found that to get the owl to be visible I had to do a lot of faint stars in the outline as well as the bigger constellation ones. |
|
Here is the constellation zoomed in. I filled in the eyes and beak for an owl face effect. (The beak is actually not coloured when the stencil is used as cut.) |
|
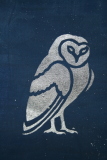
On the other side the owl is filled in in full, facing the other way. Actually, this side was done first. |
|
The silver on blue is a very strong effect. |
|
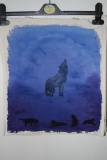
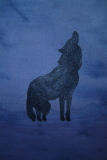
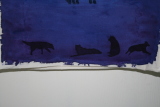
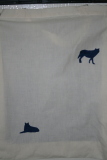
I tried for an effect similar to the elephants in this one in blue and purple but it didn't work so well because I wanted it darker, so I played around and got the cloudy/foggy sky effect instead. The wolves are painted in between layers of background paint, with further wetting on top (I have a water sprayer for ironing). The wolf outlines were got from wolf photos found online, printed out and carved up carefully with a very sharp scalpel. That got me the variety I didn't have for the elephants. |
|
"Shimmer jet black" paint mixed with a dark blue gets this lovely shade. |
|
It's very hard to get a straight bottom, the lower wolves are done in purple. |
|
And the other side was looking too plain. |
|
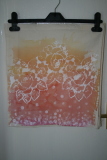
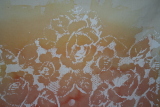
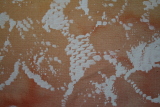
Lace (one sided bag) This bag I was trying for a red/yellow shading and it turned out a bit pink. A net curtain left by the previous owners was then laid over the top and white painted dabbed through the holes. A round sponge-on-a-stick-"brush" was used at the bottom. I don't actually like it - it's not my taste - but others have told me it's good. |
|
Close up of the lace pattern. |
|
Close up of the dabbed bit. |
|
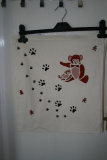
Teddy bears (one sided bag) - a combination of stencils and stamps |
|
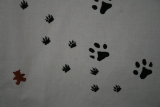
The tiny paw prints are stamped and touched up. |
|
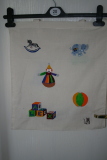
I wanted a bag for Alex's stuff. This is partly hand drawn, partly stamps, partly stencils, partly cookie cutters and partly ruler drawn. |
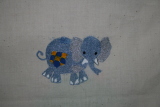
|
This elephant was stamped in a pale colour then filled in by hand. |
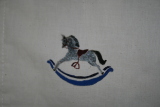
|
A stencil |
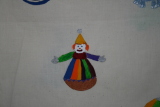
|
Hand drawn (you can see why I use stamps and stencils) |
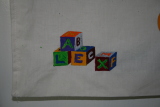
|
Personalisation, and ruler drawn |
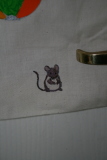
|
A very cute stamp I just HAD to use |
|
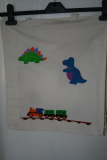
And the other side. The dinosaurs are cookie cutters, the train copied by eye based on a toy train I found online. The colours of course are toy rather than natural colours. |
|
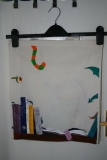
This is my wizarding bag. It's nearly all hand and ruler drawn and I'm very pleased with it. It took a lot of time because of various bits having to dry before others, particularly detail, were done. The concept is of a wizard's bookshelf, only the Big Book of Monsters (Vol II) has fallen open and various monsters are escaping. I think the cat at the top lives there, isn't just an escapee, despite his colouring. Perhaps he knocked the book over or perhaps it's just a bad idea to have such books in close proximity without chains? I rather liked the dragon - I decided I couldn't manage the body and head, but wingtip and tail would be fine. |
|
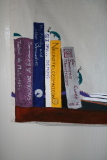
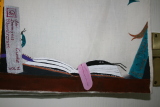
Here are the books to the left of the shelf. They are Discworld books "Summoning of Dragons" by Tubul de Malachite, "My family and other Werewolves", "I Spy... Demons", "Necrotelecomnicon" (the yellow pages for contacting and summoning the dead) and three volumes of "Liber Immanis Monstrorum" (Big Book of Monsters) by Professor Cuvee. You can also see a bookworm. |
|
Here is the open volume of "Liber Immanis Monstrorum". You can see the escaping bugs, bookworm and long legged beastie, and the tail of something rather slug-like. The book has fine serrated teeth and a large pink tongue for a bookmark. Mind your fingers! |
|
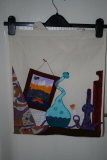
Not content with the books, I went on to do another shelf on the other side. You can see a Wizard's hat, a picture of his homeland, some of his bottles of magic potions (what's that bookworm doing?) and an invitation to a ball. |
|
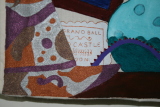
Here's the invitation in close up. |
|
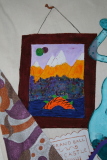
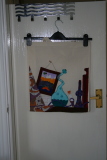
And the picture. The forest doesn't look much close to but I hope looks fine from afar. |
|
And from afar. |